So, you are done setting up your WordPress website. Next what? Let’s speed it up. So that it loads fast. Why? Because a fast loading website is good for everyone - you, your customers and your business. Thanks to WordPress community, there are really fantastic plugins available that runs your website better, faster and stronger. WP community offers many caching plugins to speed up your website like W3 Total Cache, WP Super Cache, Hyper cache etc. But, W3 total Cache is my favorite and undoubtedly best among all. Here’s a complete guide to setting up W3 Total Cache.
Before following this guide first get the base line of current loading time of your website using Pingdom tool and then install and confugre W3 Total Cache plugin to compare the results
What is W3 Total Cache?
W3-Total-Cache
W3 Total Cache is one of the most popular WordPress Performance optimization plugin that allows you to improve page speed and user experience with caching. It also improves the server performance, reduces the download time and provides a good integration with CDN (Content Delivery Network). It caches all the static content of your website and thus improves user experience of your site and speed up your website.
How to Install W3 Total Cache Plugin?
W3 total Cache Plugin is not compatible with other caching plugins like WP Super Cache. So make sure that you have only one Cache plugin installed.
Here is a short guide to install W3 Total Cache for your WordPress website.
Click on Plugin >>Add New on the left-hand sidebar menu of your WordPress Admin Panel.
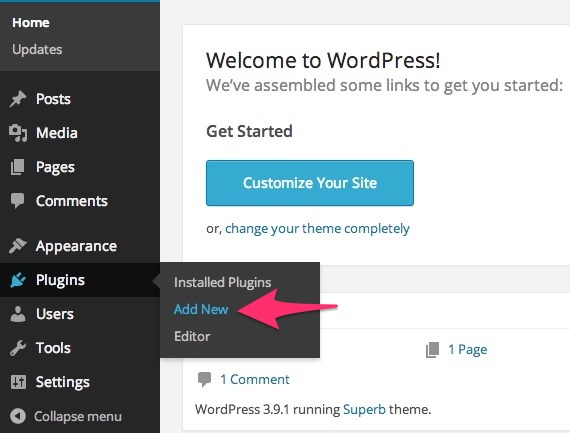
Add-new-plugin
Type W3 Total Cache in search box and you will see the result like the screenshot below:
install-W3-Total-Cache
Click on the Install Now option. Once the plugin has been installed, click on Activate Plugin option and activate the plugin.
Settings and Configurations of W3 Total Cache
When you activate the plugin Performance tab is added in the sidebar menu of your WordPress Admin Panel.

Performance-tab
Click on Performance >> General settings to set up the plugin and configure basic settings. Since W3 Total Cache is a powerful plugin, number of settings are available for this plugin.
General
In General setting you setup the plugin by enabling required settings that are supported by your host. If you enable any setting which is not supported by your host then it will slow down your server.

General
Page Cache
Page Cache creates a static copy of pages and posts of your Websites. These copies are then served when next user visits on your site. This will reduce processing load on the server. Page Caching depends on the hosting environment. If you’re using shared hosting then Disk: Enhanced is the best Page Cache Method for you else you can select any respective option.
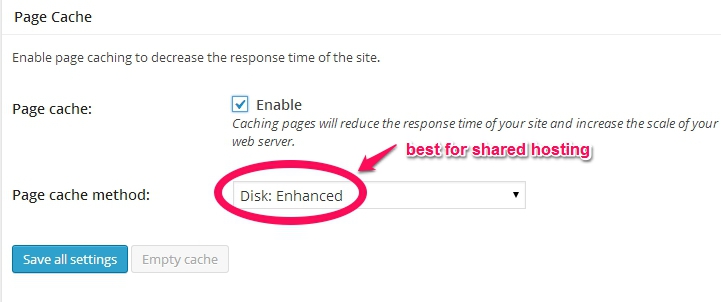
Page-Cache
Minify
Minify simply compresses JS and CSS files by removing whitespaces and excessive comments and increases site load time by 10%. On selecting Auto mode, files will be minified automatically otherwise you can also select manual mode to minify specific files. Enable this option according to your hosting environment.
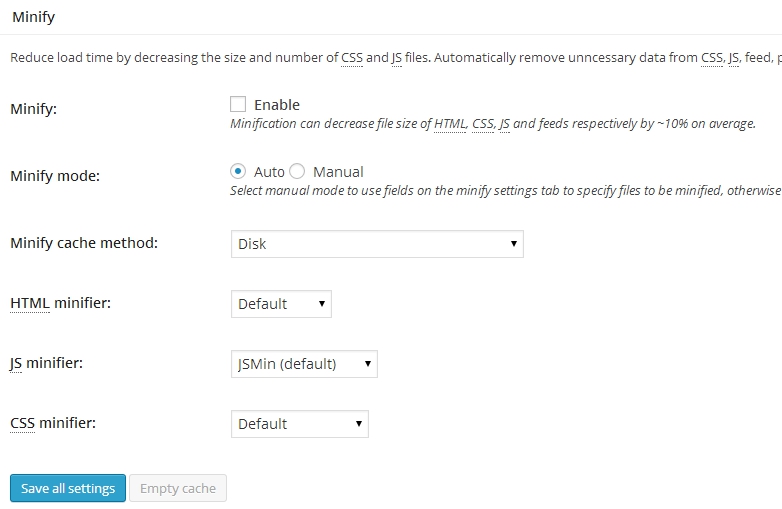
Minify
Note: After enabling minifying option, immediately look at your website to make sure that works normally or not. If not then disable this option and not use it with your website. Because sometimes Minify creates issue with themes and plugins on your site.
Database Cache
Database Cache caches SQL queries which reduces response time of your site. When you’re using Database Cache, it also puts lots of load on server which slow down your website. So generally this option is not recommended by hosts to use because it impacts your site load time. If you’re using CDN make sure to disable this option.
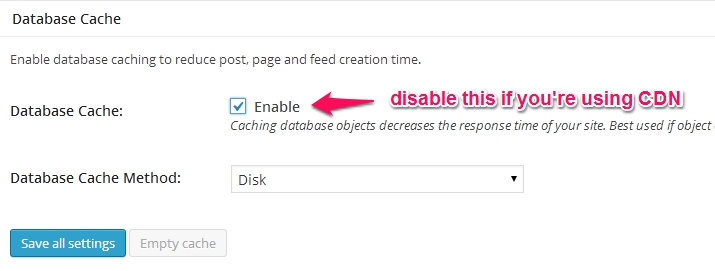
Database-cache
Object Cache
Object Caching is useful for large dynamic sites for complex database queries. It stores the cached data on disk for a particular duration of time. Change their cache method according to your hosting environment. Object Cache is not recommended for beginners. If your plugin is causing any issue then simply disable this plugin and not use it with your website.
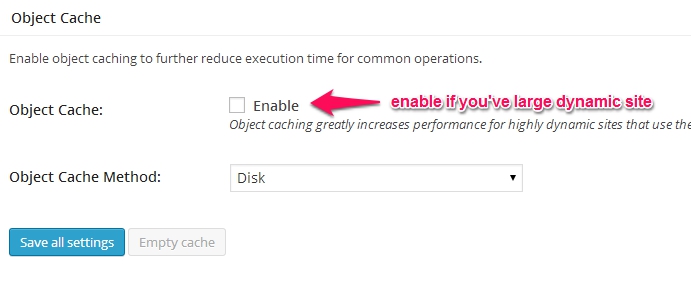
Object-cache
Browser Cache
Browser Cache creates a copy of the static content like images, JS files, CSS files and other static content with user’s browser. When same user request for the next page, it will load faster because all the static content are already in their Browser Cache. This will reduce load time and response time of your website. Simply enable Browser Cache in General Settings or you can Click on Performance >> Browser Cache and Simply enable all the options in browser cache except 404 errors and click on save all the settings button.
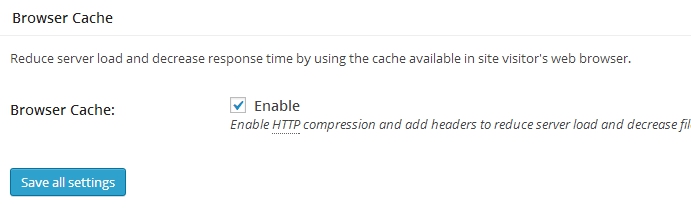
Browser-cache
CDN (Content Delivery Network)
If you want to speed your website even more then use CDN for your website. CDN (Content Delivery Network) allows you to serve copy of your content from multiple cloud servers across the internet. This reduces load on your server and speed up your website. CDN improves page load time and increases the availability of content globally.
CDN serves static content from multiple locations. Hence, parallelizing the downloads. This behavior reduces multiple HTTP requests to the hosting server. Which eventually increases the performance.
W3 Total cache supports an array of CDN providers like MaxCDN, Rackspace, Amazon S3. Depending upon your CDN provider, you can select CDN type.
After setup and configure the plugin create backup up of all W3 Total Cache settings. So that you can reuse the settings across all your websites.
That’s all you need to do to speed up your website. Now, once again check the loading time with Pingdom Tools.
If you’ve any queries related to W3 Total Cache, feel free to ask here.