It’s advised to put your site on Maintenance mode while you are re-working on it or building it from scratch. Instead of showcasing an incomplete site, it’s good to let your visitors know that the site will be back sometime soon!
Here’s how you can put your website in maintenance mode quickly and easily with a WordPress Maintenance Mode plugin while allowing admin to access the website.
WP Maintenance Mode plugin adds a maintenance page to your website that lets visitors know that your site is down for maintenance. If you want to develop a new website then this plugin is good to display a coming soon page.
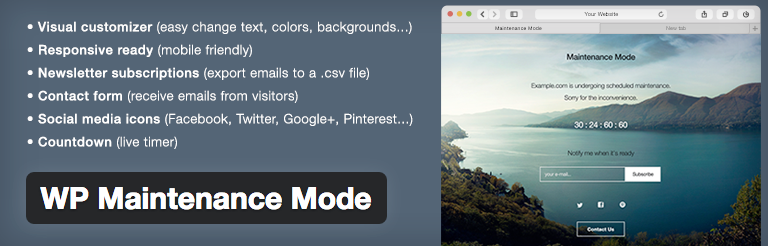
Features of WP Maintenance Mode
- Fully customizable.
- Responsive Design.
- Coming Soon page.
- Subscription form that exports emails to .csv file.
- Works with any WordPress theme.
Put Your WordPress website in Maintenance mode
Step 1: Install WP Maintenance Mode
First thing you need to install WP Maintenance Mode plugin from WordPress plugin repository. After activating the plugin, click on Settings >> WP Maintenance Mode to configure the plugin.
Note: Before configuring the plugin make sure you’ve created the backup of your website.
Also Read: How to install a WordPress plugin
Step 2: Configure WP Maintenance Mode
Once you reached to the settings page of the plugin, you’ll see three tabs on the page.
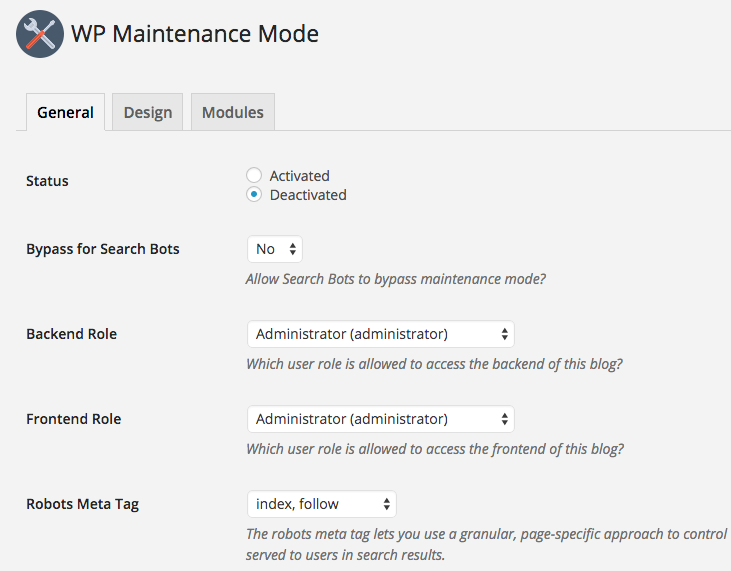
On General Tab you’ll see number of options. First option is status which is deactivated by default. Activate the Status to put your website in maintenance mode.
If you want search engines to see your website in maintenance mode then enable Bypass for Search Bots option to yes. You can also skip this option.
The plugin also allows you to access full website under construction mode. You can login to your dashboard and see working website. You’ve to choose user roles to access the frontend and backend of your website.
You can leave other settings as it is. Once you’re done with all the settings click on Save Settings button.
Step 3: Design Tab
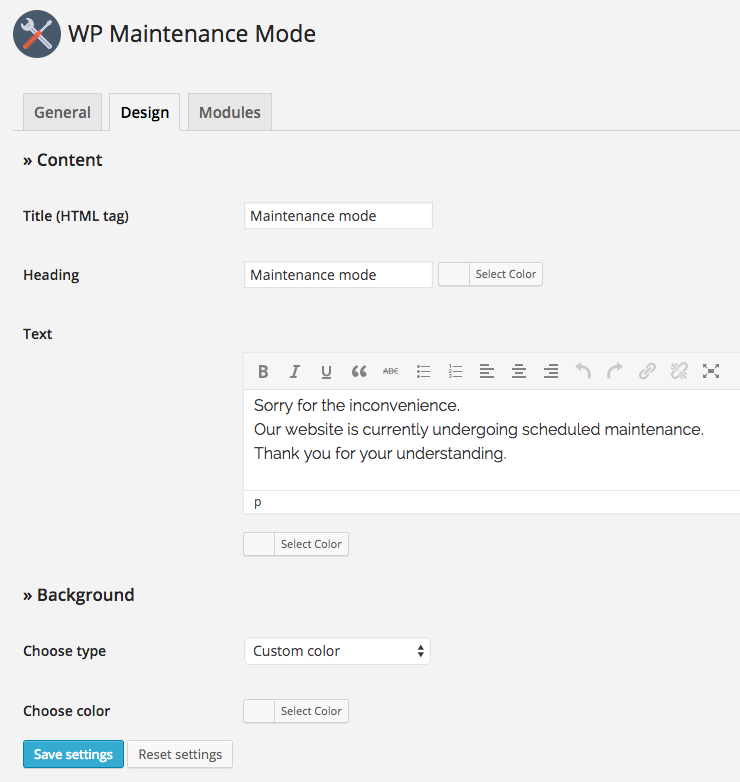
Here you can create splash pages to display during maintenance mode. First yo need to give title and headline to your page. You can also change the color of your heading. Provide the content that you want to display on the maintenance page.
Next option is to choose background for your maintenance page. The plugin provides you three options to select a background gor your maintenance page.
First one is to select custom color from the color picker. Second one is uploading a background image and third one is to select predefined background image.
Once you’re satisfied with your settings, click on Save settings button to save your settings.
Step 3: Modules Tab
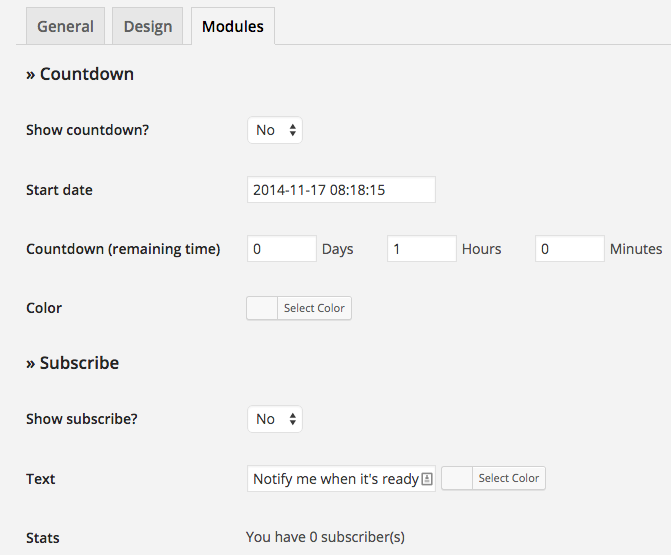
If you want to display coming soon page then you can use Module settings for this. First thing you need to set Show Countdown to ‘Yes’. Enter the starting date and remaining time that will be displayed on the page.
You can also choose color for the timer. Next section is Subscribe where you can display sign up forms. User can fill these forms by providing their e-mail addresses to receive updates.
In addition to this you can also display social icons to your social networks. Last option is to display contact information where users can reach you.
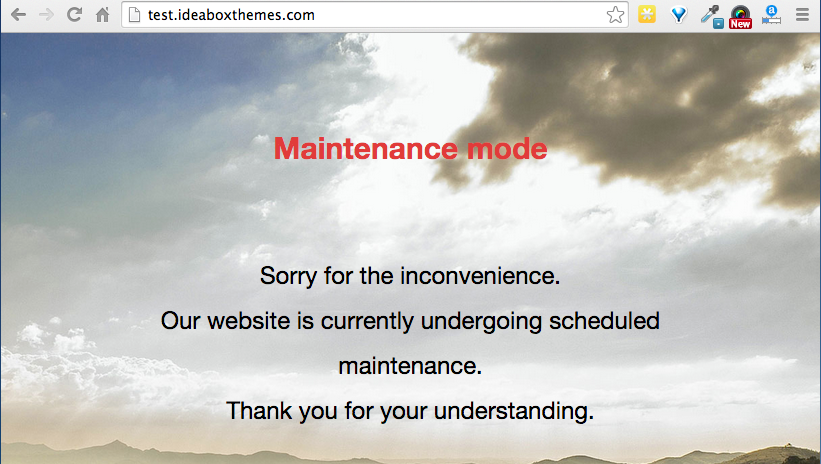
Once you’re done with all the settings click on Save Settings button to save your settings. The final result displayed on your website is like below screenshot:
I hope this article helped you in successfully putting your website under maintenance mode without affecting your site data and frontend. If you’ve got any queries, feel free to ask.