In the first part of WooCommerce tutorial we looked at the installation and set up of WooCommerce plugin. Now that you’ve completed the set up of WooCommerce plugin, you can easily add products on your site. In this WooCommerce guide, we’ll look at different product types and how to add products on your site. This article will help you setup your online store. You can check the previous article for various configuration options that should be followed.

Adding Your Products
Now WooCommerce is completely set up on your site, let’s add your first product. It is similar as adding any WordPress post or page with some additional features.

When you are adding your product the first thing to determine is what type of product do you want to add.
WooCommerce supports four Product Types:
1. Simple Product
Simple product is very simple and easy to use Product type. It covers the majority of products you want to sell. The products are simply shipped and have no options. For example, pen.
2. Grouped Product
Grouped product is the collection of the related products that can be purchased individually. For example, a USB drive that comes in different sizes like 2GB, 4GB, 8GB etc.
3. External/Affiliate Product
An External/Affiliate product is one which you describe on your website but is sold on a third party website.
4. Variable Product
A Variable product is one which has variations in size, colour, stock etc. For example, t-shirt.
With WooCommerce plugin you also get a set of custom taxonomies. Category and tags work same as any other post type categories and tags. Make sure you define your category properly because customer will navigate your store with the help of these category.
Attributes can be added per product or you can add global attribute for your entire store.
Let’s add some product in each product type.
Adding Simple Product
Adding simple product is a straight forward process and similar as standard WordPress post. Click on Products >> Add Product. You’ll see the interface like below screenshot:
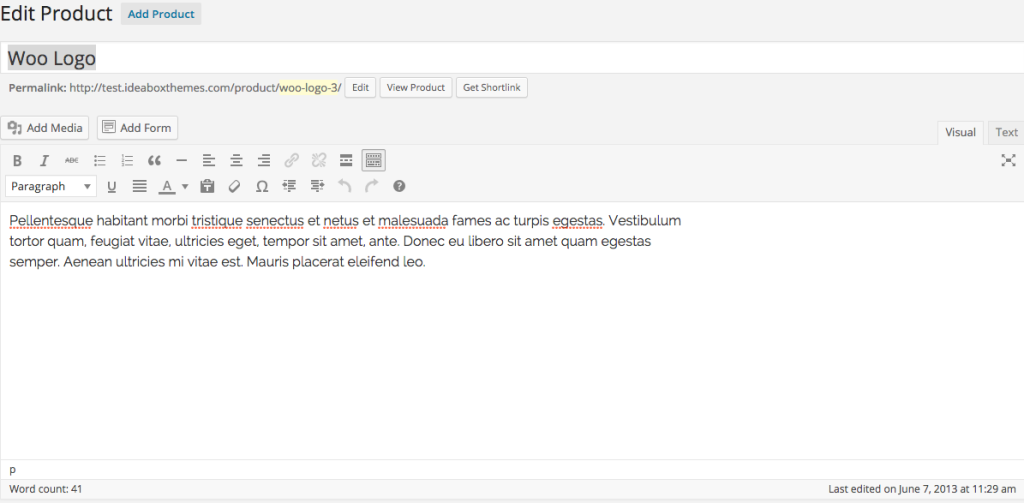
Enter your Product title and Description in the main WordPress Dialog box. You can do formatting same as you do in WordPress post.
Under the main dialog box, there is Product Data panel. This is where you have to add the important information related to your product.
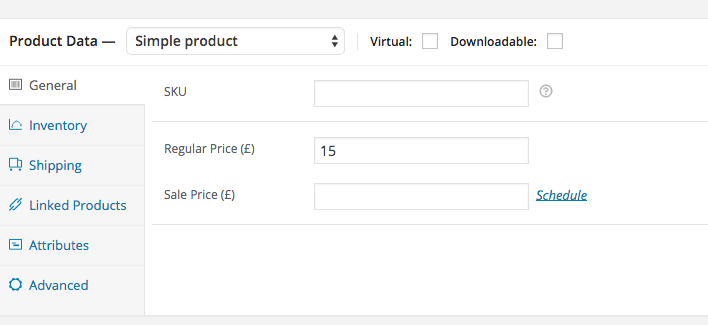
Product data
There is drop down menu where you’ve to select the type of your product This is where the majority of the product data is input.
General Tab
- SKU: Stock Keep Unit which is unique identifier for your product and optional. It should be named so it does not clash with post ids.
- Price: In this section There are two types of prices. Regular price is your product’s main price and Sale price is your product’s sales price.
Inventory Tab
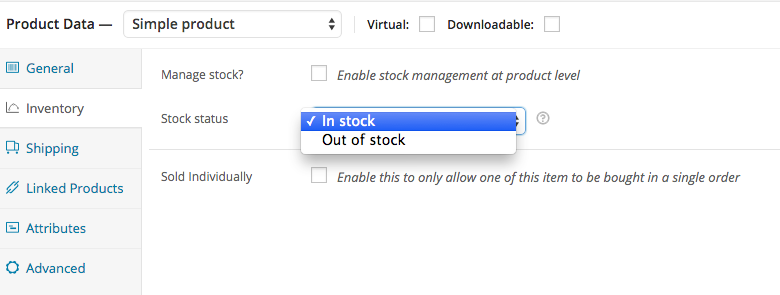
Inventory tab allows you to manage stock for your product individually and change for option for handling backorders. If Stock management option is disabled then only stock status will be visible.
Shipping Tab
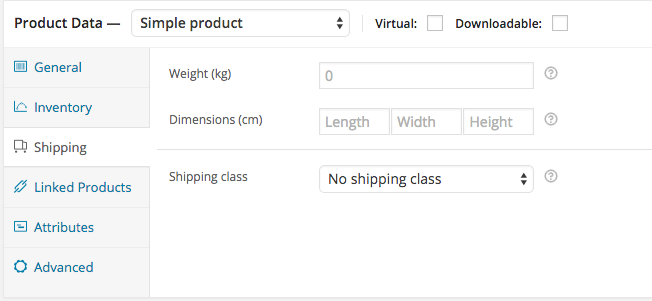
- Weight: It defines weight of the product.
- Dimensions: Defines length, width and height of the product.
- Shipping Class: These classes are used by certain shipping methods to group similar products.
Linked Products Tab
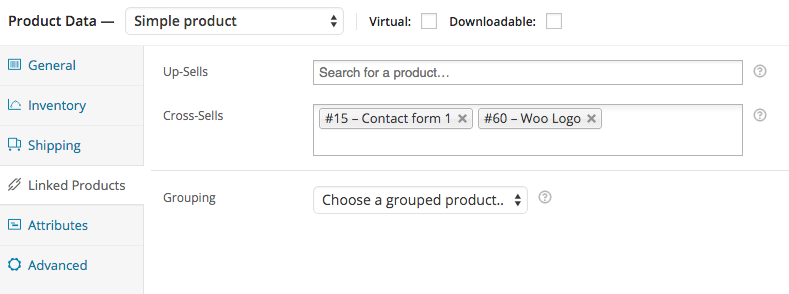
In this section you can promote your products with one another. They can be added by adding a particular product from drop down or by searching a product.
- Up-sells: Up-sells are displayed on the product details page. These are products which you may wish to encourage users to upgrade to based on the product they are currently viewing. For example, if user is viewing coffee details then you may display tea kettles on the same page.
- Cross-sells: These are the products which are displayed at the cart and related to the user cart.
- Grouping: Set this option to make this product part of grouped product.
Attribute
In this section you can assign attributes to your products. Once you’ve selected your attribute, click on Add button and you’ll be able to apply the terms that are attached to that attribute.
Advanced Tab
- Purchase note: In this section you’ll custom note that is sent to your customer after purchasing.
- Menu order: Customer Ordering position for the item.
- Enable Reviews: Customer reviews on this product.
Excerpt
In this section you’ll add short description of your product. if you don’t add any description then one will automatically add description.
On the right hand side you’ll see different options like add new category, tags and more. Product categories are similar to the categories in WordPress post. You can also add product tags in similar manner.

Product Images
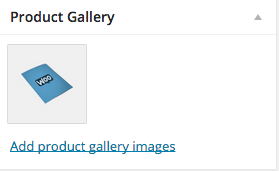
In this section you can image of your product. Click on Add product gallery images and select your product image.
Catalog Visibility and Feature status
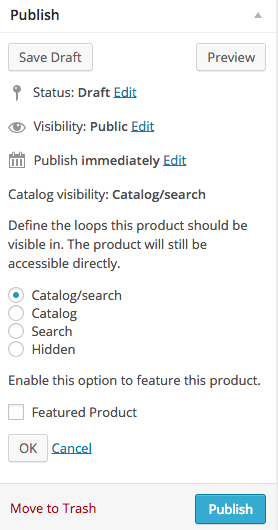
In the publish section you’ll see Catalog visibility which has four options:
- Catalog/search: visible everywhere.
- Catalog: visible in catalog loops but not in search.
- Search: visible in search result but not in catalog.
- Hidden: only visible on the single product page.
Adding Grouped Products
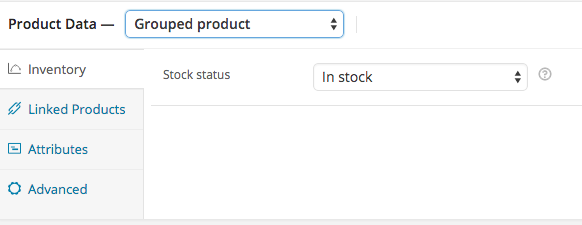
Grouped Products are added in similar way as Simple Products. Once you’ve selected Grouped Product type, there are some fields and tab that will be disappeared. You can also child product. Once you’re finished with parent product, publish it and come back to Product >> Add New.
To create a child product click on Product >> Add New and add the product in the list. Next, go to Linked Products tab and select your product parent from the Grouping drop down menu.
Adding Virtual Products
When you’re adding Simple Products, check Virtual option. This will remove unnecessary fields from the settings.
Adding Downloadable Products
When you check this option in Simple Products, you’ll see two new options: File Path which defines path of your downloadable file and Download limit which sets the limit for the number of times customer download the product.
Adding An External Product
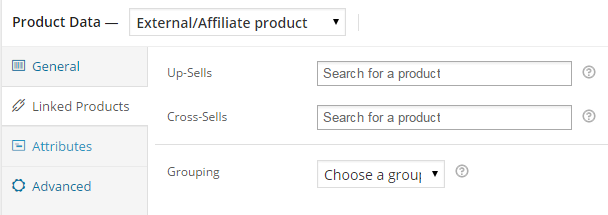
Once you’ve selected the section from the drop down menu, it will remove all the unnecessary fields and tabs. This is the place where user can purchase products. Rather than Add to cart button they will see read more button which is linked to the URL of this product.
Adding a Variable Product
This is the most complicated product type to set up. Variable Products offers you variations of products with different prices, stock, color, and more. To add the variable product, first you need to select the product type ‘variable’. Next add attributes for your products like below screenshot:
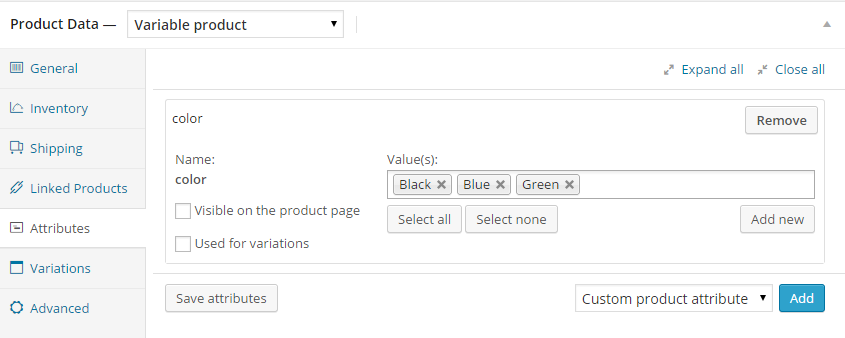
Now click on Variation tab. There you’ll see an option of Add Variation like below screenshot:
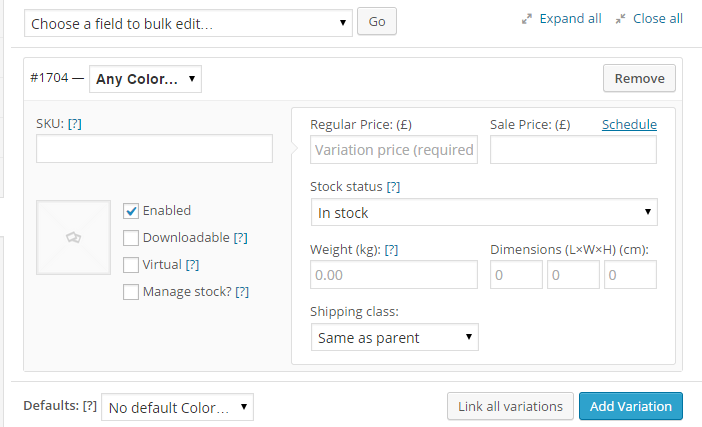
Each variation of the product may be assigned the following data:
- An Image: Click on the image icon to see WordPress media uploader. Once you upload an image, click on Insert post and add image.
- SKU: Set SKU for the variations or leave it blank.
- Stock Quantity: Stock for the particular variation, or left blank to use the variable product’s stock settings.
- Weight and Dimension: This can be set for the variation or left blank to inherit from the parents.
- Price: The only required field. Price of the variations.
- Sales price: Sales Price of variations.
- Downloadable: If variation is downloadable product then check this box.
- Virtual: If variation is virtual then check this box.
- Enabled: Uncheck this box to disable the variation.
- Shipping class: Shipping class can affect shipping. Set this if it differs from the variable product.
- Tax class: A tax class for this variation. Useful if you are offering variations spanning different tax bands.
Price field must be set for each and every product. You can bulk edit the variation by using bulk edit option. Variable Products is quite difficult for you. So give some time to set them up.
That’s all you’ve to do to add products on your WordPress website. By following above steps you can create your first product on your e-commerce website. WooCommerce is one of the best e-commerce plugins I really enjoy working with.