A popup optin box appears in a light box format on your website. This optin box helps you to turn more visitors of your website into subscribers. There are number of ways for online business marketing but e-mail marketing is one of the most effective ways.
In this article, I’ll show you how to add optin box in WordPress website using some powerful plugin to boost your conversion rates.
Also checkout our List Builder WordPress theme to increase e-mail signups on your website.
PopupAlly is my favorite plugin to add optin box on any website.

PopupAlly allows you to design a pop up sign up form within 5 minutes and increases the conversion rates. The plugin also enables you to build your own list of people and capture all the lost visitors with exit-intent popups.
Main features of PopupAlly plugin are:
- Customize the look and feel of your popups.
- Compatible with Aweber, MailChimp, MadMimi, iContact, GetResponse, Infusionsoft, Ontraport, and any other email marketing systems that provides HTML opt-in code.
- Allows you to decide how often your popup should re-appear if someone closes it, so it doesn’t annoy your visitors
- Super easy interface allows non technical user to install plugin on their website and running ity on their website within a miniute.
How to Install and configure PopupAlly ?
To create a popup optin box on WordPress website, first you need to install the plugin. To install the plugin you can check our previous post on how to add a plugin on WordPress. Once you install and activate the plugin, you’ll see a PopupAlly option in your WordPress navigation bar like below screenshot:

Now, to customize the look and feel of popups, navigate to PopupAlly >> Style settings.

Once you clicked on style settings, you’ll see two popups option same as below screenshot:
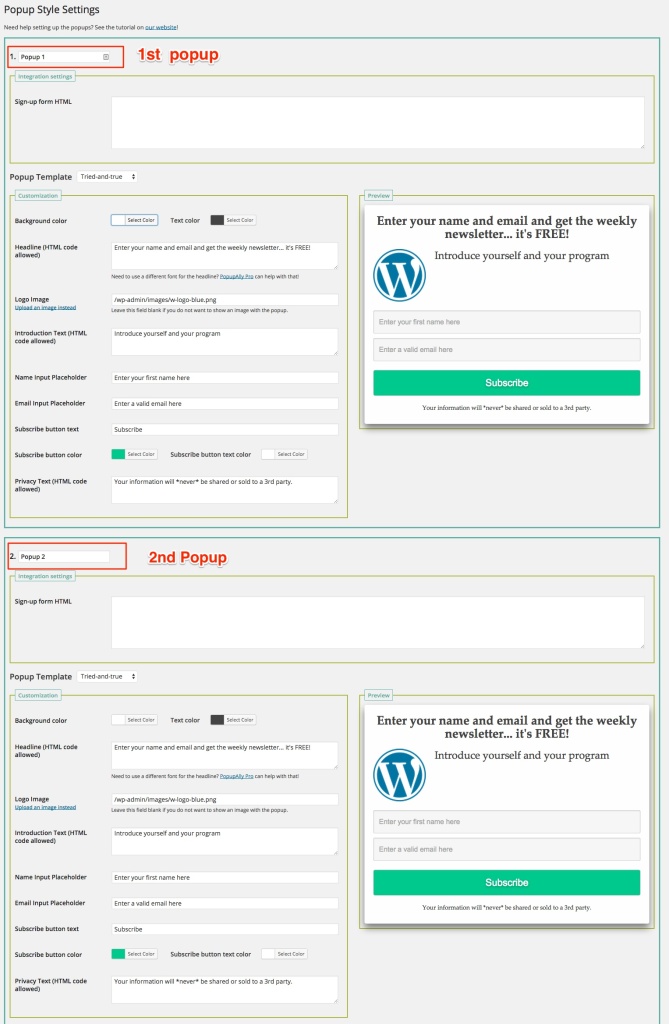
There is no need to use both the popups option on your website. Now simply add the Popup box details in any of the option. In our example we added newsletter signup popup optin box on our website.
Now before configuring any popup setting, first give your Popup a meaningful name like this:
 Now every Popup option has two sections:
- Integration Settings: This section describes that how your Popup will interact with your email service provider.
- Customization Settings: In this section you will change the look of your popup box.
Integration Settings
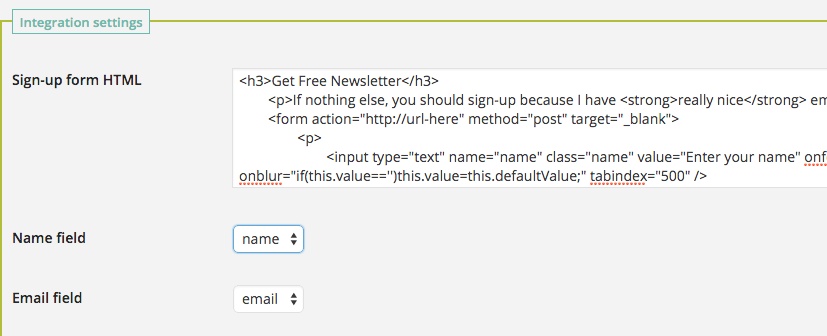
In this section you need to add a HTML code provided by the email service provider. Once you added the HTML code in sign up box, click out of the text box. You’ll see two more options. These options will ask you the inputs for name and email.
Note: If you’ve added wrong HTML code then you’ll get error.
Customization
In this section you’ll change the look and feel of your Popup. Whenever you change the settings in the Customization section, the preview of your popup box will display on the right side.
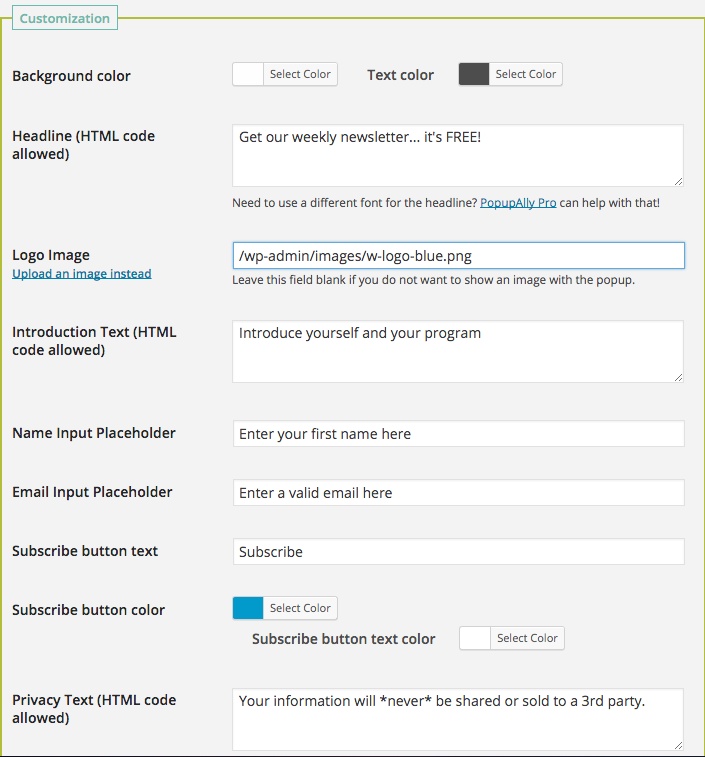
Once you changed all the settings click on Save Changes button to save all the changes in your popup box. Now click on PopupAlly >> Display settings. You’ll see number of option on Popup Display settings page.
- Time-Delayed Popup: In this section a time delay is to be set which means your popup will display after a set delay.
- Exit-Intent: This section is triggered when mouse cursor heads up towards close button.
- Embedded signup: This section is technically not a popup but it is used to embed a sign up directly on a page.
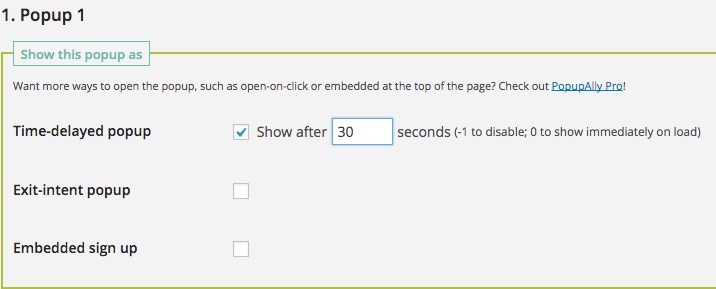
Once you click on Time-delayed option you’ll few more options below where you can set the pages where you want to display your popup box.
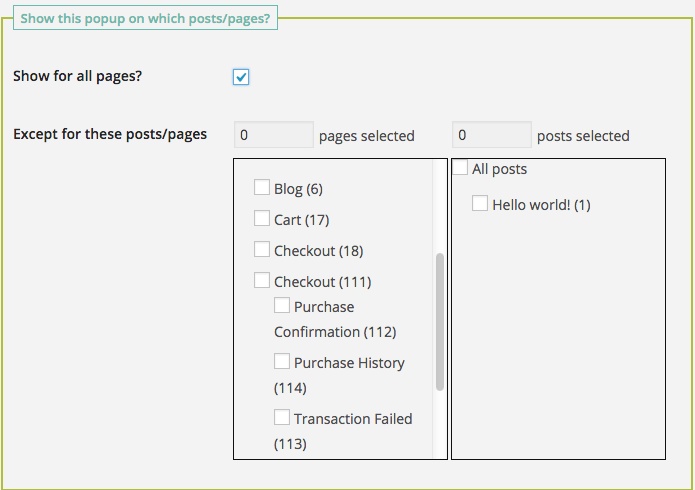
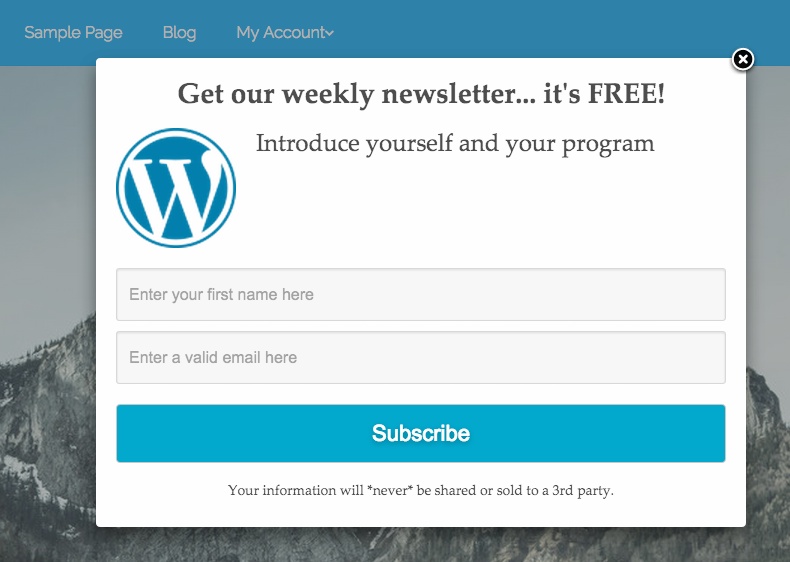
Now click on Save Change Button. After configure all the settings you’ll see the result like below screenshot on your website:
 If you’ve got any queries related to plugin or this tutorial then feel free to ask us in comment section below.